Installation Basics
Note
This page is essentially legacy documentation, but still provides some useful information for alternative methods of downloading and working with DKAN. For a more robust local development for working on DKAN core, see Local Development Environment. For the most up-to-date documentation on managing website projects with DKAN, see DKAN Starter documentation.
Before getting started, it’s recommended that you familiarize yourself with:
- Drush, the command line tool
- Drupal’s installation process
- Drupal’s upgrade process
- Drupal profiles and distributions
What you will find in the main DKAN Repository is a Drupal installation profile. To set up a working website using DKAN, you will need to acquire or build a full DKAN distribution of Drupal.
Tip
DKAN Tools contains scripts that CivicActions uses for our own implementations and deployments.
Requirements
Operating Environment
DKAN is based on Drupal software and – generally – runs anywhere Drupal is supported. This document assumes installation on a Linux-based Apache webserver using MySQL as a back-end database (aka LAMP server). For other environments, please see our Alternative Environment Support.
- MySQL: minimum version 5.0.15+ with PDO
- before installation, please create one MySQL database and associated user.
- PHP: minimum version 5.3.x
- Apache: minimum version 2.x
- Git
Hardware
DKAN has been successfully tested in limited-resource environments, such as Amazon’s “micro” AWS instance, for development.
- Minimum RAM: 1GB for development, 2GB or more recommended for production.
- Minimum Disk: 64M for base installation, recommended 1GB or more for production.
DKAN is based on Drupal and follows the same basic installation procedure as any Drupal distribution. More information about various requirements can be located in the Drupal Installation Guide.
Pre Installation
Using fully made version
At the moment, our supported fully-made DKAN codebase is the DKAN DROPS-7 repository, which is optimized to run on the Pantheon platform. You can build a DKAN site with a single click on Pantheon here. (We also offer one-click installation on Acquia)
Download and unzip the latest version of the “DKAN DROPS” codebase on your server webroot.
if you want to do this with git instead:
$ git clone --branch master https://github.com/GetDKAN/dkan-drops-7.git dkan
Build your own
This “builds” a full DKAN website codebase from the bleeding-edge development version of DKAN, by downloading Drupal and all the additional modules that DKAN needs to run. You may want to use this method to get recent changes that have not yet been included in an official release, or to use a branch or forked version of the DKAN profile.
Note that rsync is used to copy the DKAN profile inside the Drupal
/profiles folder. You may wish to modify this process to fit your
own development practices.
Requires drush version 8.x.
$ git clone --branch 7.x-1.x https://github.com/GetDKAN/dkan.git
$ cd dkan
$ drush make --prepare-install drupal-org-core.make webroot --yes
$ rsync -av . webroot/profiles/dkan --exclude webroot
$ drush -y make --no-core --contrib-destination=./ drupal-org.make webroot/profiles/dkan --no-recursion
$ cd webroot
You can also build from a specific release of DKAN by checkout out the correct tag after cloning. For instance:
$ git clone --branch 7.x-1.x https://github.com/GetDKAN/dkan.git
$ git checkout tags/7.x-1.17
...
The automated software builder will download and configure the latest version of DKAN and prepare it for installation. When complete, proceed to “Installing the DKAN Software” section below.
Note before proceeding: Recline previews require clean URLs
Installation
Once you’ve downloaded the DKAN software, it’s time to install it. If you’ve previously installed Drupal, this process will be very similar.
With drush
$ drush site-install dkan --db-url="mysql://DBUSER:DBPASS@localhost/DBNAME"
You can add the --verbose switch if you want to see every step. The
installation should end with drush creating an admin account with a
random password, which will be output in a message to the terminal.
With the web installer
- Open a web browser and visit http://YOURDKANSITE/install.php:
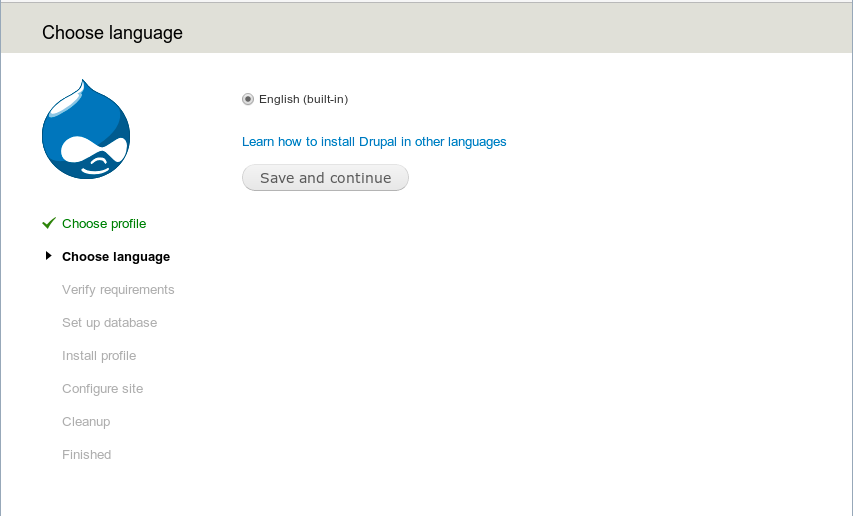
Installation Screen
- The first installation screen is a language selection menu. Although DKAN does provide limited multi-language support, installation must currently be performed in English. Continue.
- At this point, your server resources and capabilities are checked to ensure they meet DKAN installation requirements. All errors must be corrected before installation can proceed. Instructions for correcting each error condition are provided.
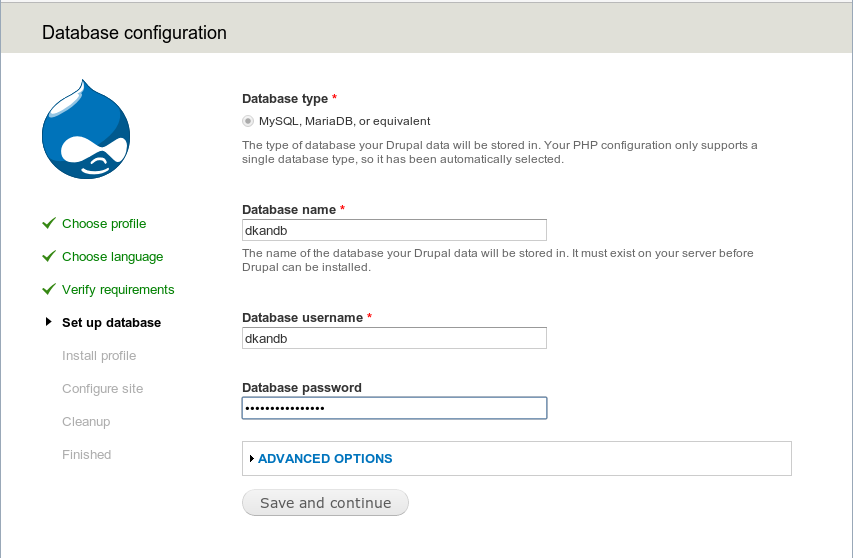
Installation Screen
- Once your server meets all installation requirements, you’ll be presented with the database configuration screen. Enter your MySQL database name, database username, and database password, then click “Save to Continue” to proceed.
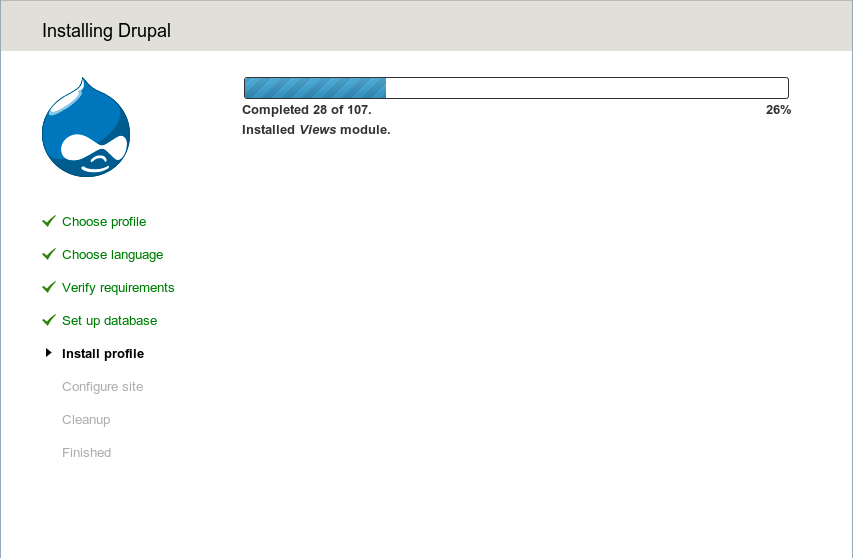
Progress Bar
- The installation will proceed, displaying a progress bar on the screen. Depending on your server resources, this may take several minutes.
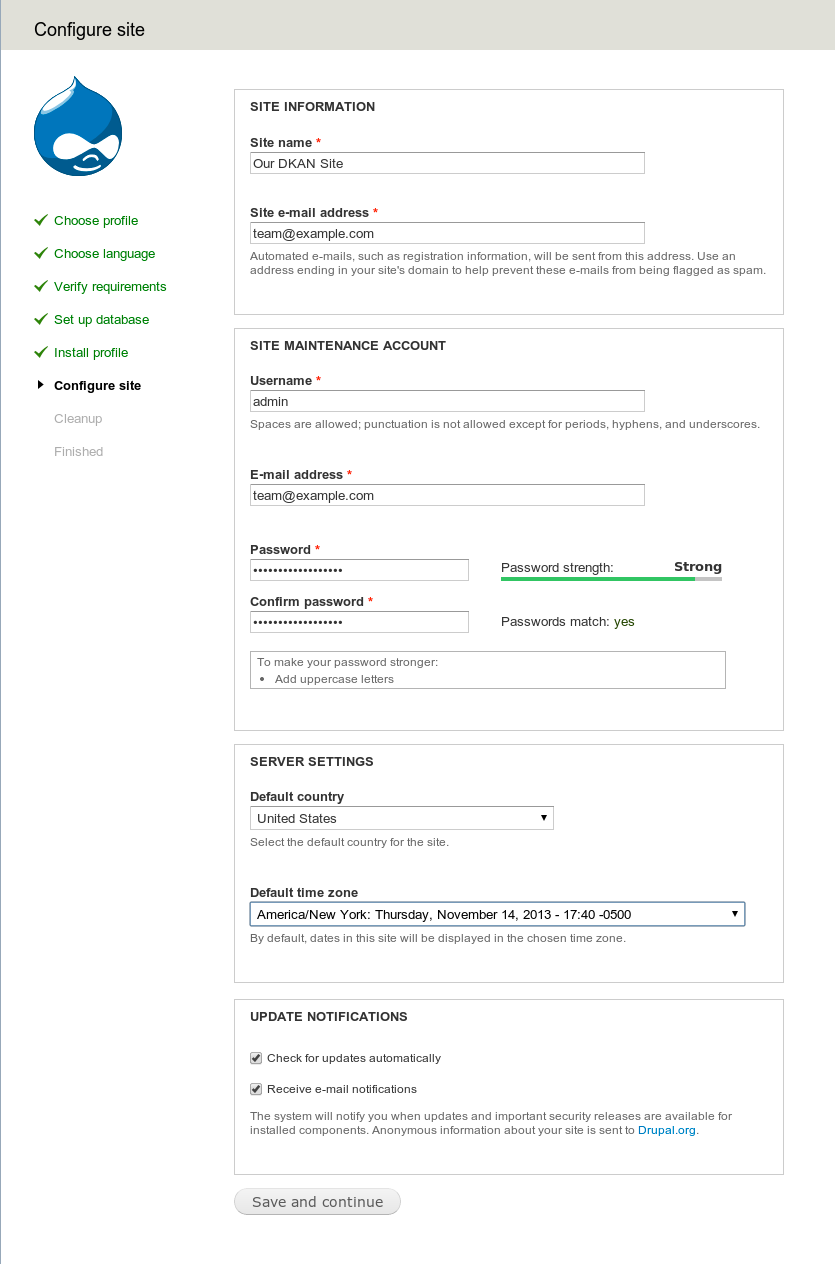
Configuration
- When installation is complete, the site configuration screen will be displayed. Follow the prompts to set your administrative username, email address, site name, time zone, and other default settings as shown. If the final configuration completes without error, you’ll see a short congratulatory message and you’ll be prompted to access your new site.